MarketOmation Help & Support
How to Create a Simple Membership Area
Creating Product Course
You can connect to a payment processor like Stripe to collect payments from your customers.
This is where you can create courses to build a gateway to memberships.
You can decide to use the templates provided (Sprint, Marathon, and Membership) or build your course from scratch. The process of creating these courses is all the same.
For the purpose of this training, I’ll be using the “Sprint Course” as an image reference.
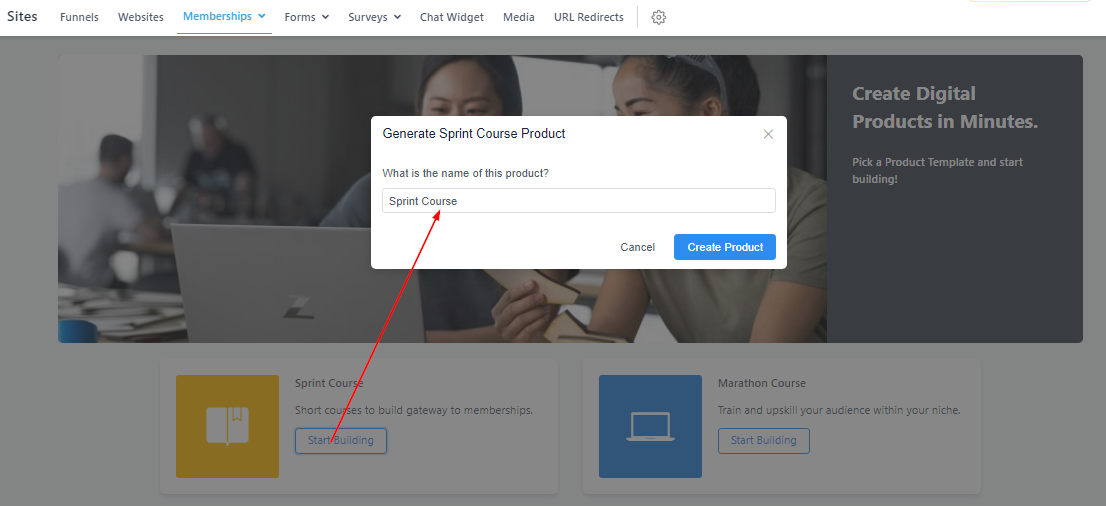
Generate Course Product
Here you will give the course you are about to create a name, then click on “Create Product” to save it.
When you create the product course, it will appear as shown below. Here you can either edit, preview, customize, or clone this course. You can also set a price value for the course.
Outline: Create a Category
To add or create a category to your product, click on the (+) beside the Product Structure. You will give the category a title and then save it!

Add Lesson
You can decide to add lessons to your Product and don’t forget to add a title for each lesson you create.
- Preview: Click on the Preview button to see how your lesson looks like when it goes live
- Add Video: Click on “Select Video” to upload a new file. The supported video types are .mp4, .webm, and .mov
- Post Details: This section consists of the Lesson title, the Category the lesson belongs to, and the body of the lesson.
- Visibility: When you are done editing your lesson, you can switch to Publish mode from Draft.
- Product Thumbnail: This image will be displayed when your members view each lesson. The recommended dimensions is 1280×720. To add an image, click on the “Select Image” button and upload a new file from your device. If you want to delete an uploaded image, You can click on “remove” on the right side of the “Select image” button.
- Files: You can upload any additional info/files here.
- Save: Don’t forget to save your work!

Add Subcategory
You can add subcategories as well and add the title.
- Title: Type in here the subcategory title.
- Description: Write a brief description of what this sub-category entails.
- Parent Category: This shows the main category this sub-category falls under.
- Content: Select the content you want for this section, either a lesson or an assessment.
- Visibility: When you are done editing your lesson, you can switch to Publish mode from Draft and you can decide to lock the sub-category or switch to Drip mode.
- Product Thumbnail: This image will be displayed when your members view each lesson. The recommended dimensions is 1280×720. To add an image, click on the “Select Image” button and upload a new file from your device. If you want to delete an uploaded image, You can click on “remove” on the right side of the “Select image” button.

Add Assessment:
This allows you to add Assessment to your product. You can either choose to add a Quiz or an Assignment as your assessment and don’t forget to add a title.

Quiz
Set up your quiz questions and requirements here;
- Quiz Title: Type in the quiz title here.
- Passing Grades: You can make passing grades a requirement to move to the next stage and input the passing grade.
- Pass/Fail Comfimation massage: You will also have your Congratulation message for those who passed and a Try Again message for those who failed.
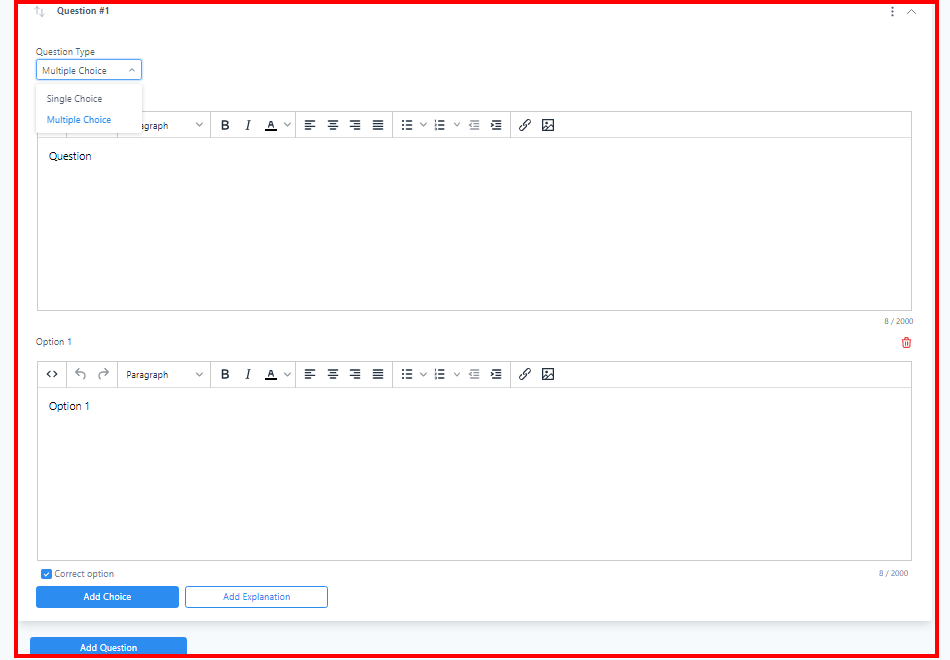
- Quiz Question and Answer: Don’t forget to add your question. You can choose the single or multiple-choice question type and also add the answer options, tick the option with the correct answer.
- Draft/Publish: you can leave your quiz as a Draft if you are still working on it and switch it to Publish when you are done.
- Preview: You can preview the quiz you’ve made by clicking on the Preview button.
- Save: Don’t forget to save your changes so as not to lose your quiz.
- Delete: If you want to delete the entire quiz, click on the Delete button, it will ask for a confirmation before deleting permanently.


Assignment
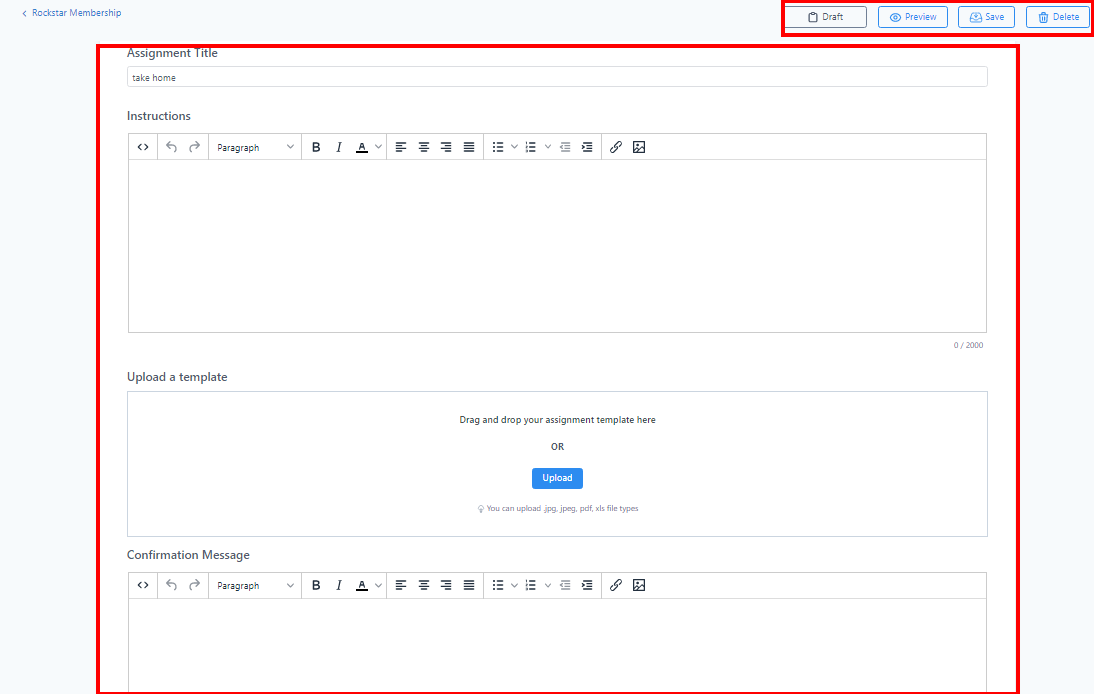
In the Assignment section, you can set up your questions for your members;
- Assignment Title: Type in the title for your assignment here
- Instruction: Give the necessary instruction to follow concerning the assignment here
- Upload template: Upload your assignment template here, it can be in .jpg, jpeg, pdf, or Xls file types.
- Confirmation Message: This message will appear upon student assignment submission. Set your student’s expectations by letting them know what the next steps are.
- Draft/Publish: you can leave your quiz as a Draft if you are still working on it and switch it to Publish when you are done.
- Preview: You can preview the quiz you’ve made by clicking on the Preview button.
- Save: Don’t forget to save your changes so as not to lose your quiz.
- Delete: If you want to delete the entire quiz, click on the Delete button, it will ask for a confirmation before deleting permanently.
More Actions
You can edit and preview your lessons/subcategories/Assessments, or you can decide to switch them to these visibility modes;
- Draft mode: Your product won’t go live when it is in draft mode so you can edit all you want till you are ready.
- Published: When you are done editing, you can make your product live by clicking on the Publish mode.
- Locked: When you have more than one Product Structure category, you can lock each category, and until the visitor marks the preceding category completed before they can gain access to the next category. You can do that by simply clicking on the “Locked” icon and then selecting the post from the preceding category the visitor will “Mark As Complete” before the next category can be opened.
- Drip mode: If you want to set the number of days a visitor can have access to your product when they acquire it, you can simply select the number of days the visitor has to complete each category.
- Collapse/Expand: You can collapse or expand each Category by clicking on the Up-down arrow beside the visibility mode menu.
- Preview: You can preview by clicking on the Preview button at the upper right corner of the Outline page.
- Clone /Delete: You can clone or delete your product by clicking on the 3-dot menu beside the Preview button. Once you click on “Clone” this popup notification drops, You can either clone this course in this location (i.e this current CRM account you are working in) or multiple locations (i.e other account/sub-accounts within your CRM). Select the location you prefer and click “Clone”.


Edit your Details:
Title
You can edit/update the name of this course anytime by typing the new name into the title box provided.

Description
In the Description box, you can type a one-liner about your product to give the members a glance-knowledge about it. This description will be displayed on the product welcome page and you can click on “Preview” or “Go To Product” to see how it looks when published.

Product Thumbnail
This image will be displayed when your members view their library. The recommended dimensions is 1280×720
To add an image, click on the “Select Image” button and upload a new file from your device. If you want to delete an uploaded image, You can click on “remove” on the right side of the “Select image” button.

Customization
Instructor
If you have an Instructor for the course you are building, you can add their information here. It will give the members an oversight of who their instructor is.
- Heading
This is where you type in the header. For example “Instructor”.
- Headshot
This image of the instructor will be displayed when your members view the course. The recommended dimensions is 300×300
To add an image, click on the “Select Image” button and upload a new file from your device. If you want to delete an uploaded image, You can click on “remove” on the right side of the “Select image” button.
- Name
In this slot, you will type in the name of the Instructor, or whatever name the instructor would like to be addressed as. This name will be displayed for members viewing this course.
- Title
You can type in the instructor’s job title here. For Example, “Coach”.
- Bio
You can type in a brief biography of the instructor here. You are allowed to type in a total of 1000 words.
- Logo Image
When you upload a “Logo Image”, the image is displayed in the upper left corner of the course page. The recommended dimensions is 640×640.
- Favicon Image
When you upload a “Favicon Image”, the image is displayed in the web tab of the course page alongside the web tab title. The recommended dimension is 32×32.


Advanced
Here You can add your Custom JS, CSS, and Tracking Code.

Customize Your Theme:
If you want to customize your product page, you can click on the “Customize” icon and you will be directed to the customize page. This is what the customize page looks like, you can edit the Theme Layout of the course you are building.

Add Product Offers:
If you want to see the offer(s) connected to this product, click the Offer button. You can Preview, edit or View the Checkout page.
The Checkout page consists of the;
- Offer Details: You can edit the offer banner, video, poster image, Logo image, and checkout copy.
- Extra Contact Info: You can enable the Collect Address and phone number.
- Service Agreement: Enable or disable the Service Agreement as a requirement. You can also customize your agreement text.


View Comments:
You can view all the comments made for each of the lessons and assessments. If you want to view all comments and see the deleted ones, simply select the View All button
